
While I am happy with how this painting came out, painting on black canvas proved to be a bit of a challenge. Now that I know all of the tricks, next time will go much smoother! I'll share my mistakes here, all in all mistakes or no, it came out pretty good, and such a romantic image!
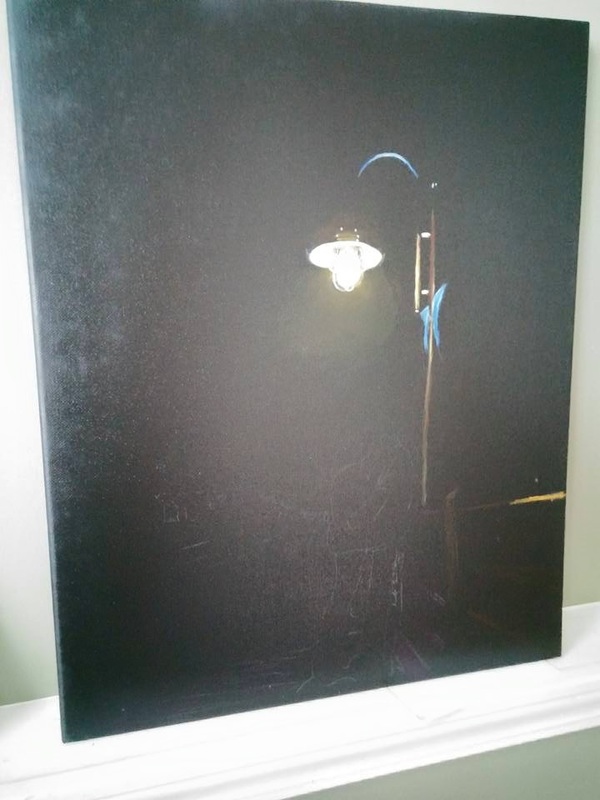
So, one of the first things I noticed is how HARD it is to photograph a black canvas... so I apologize for the poor photos! The cool thing about painting on black canvas is you kinda go about it backwards! For instance... you see the blue flags here? Well, I would have thought that you just mix that blue and put it onto the canvas... but no... I put the ultramarine straight onto the black canvas...when you do that, you can barely see the blue... next, I took the tiniest bit of titanium white and dry brushed it onto the ultramarine. When I did this the color just started to jump off of the canvas, while the spots with little to no titanium white sank back into the shadows. It was SO cool. I wish I video taped it! Now, I'm not sure what would have happened if I just mixed the color and then applied it... maybe it would have been the same outcome, but this sure was fun!
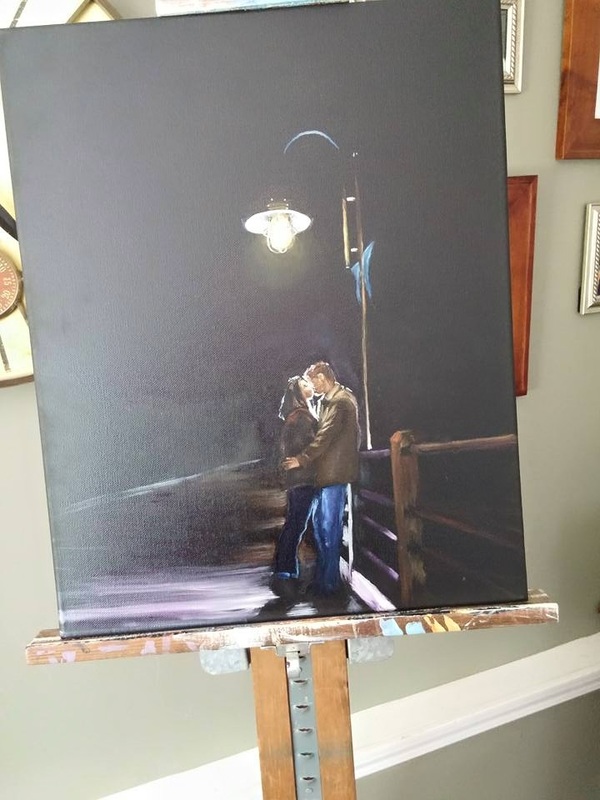
Next up after much delay, were the people. I was nervous about this.. I have a hard enough time with skin tone on white canvas, never mind black! Luckily the people had very little detail in the face and highlight consumed a good portion, so I just went about it all almost abstract.
Next up was the building, It was SO much fun! It was like taking the paintbrush and turning the lights on! I was really happy with how it came out. I started with Cadmium Orange, then Lemon Yellow, then dry brushed some titanium white. That is one important thing I learned through my "pre painting research" (thank god I did some) was not to put yellow directly onto the canvas, to always put orange first, otherwise the yellow will appear greenish. Good. To. Know. !!
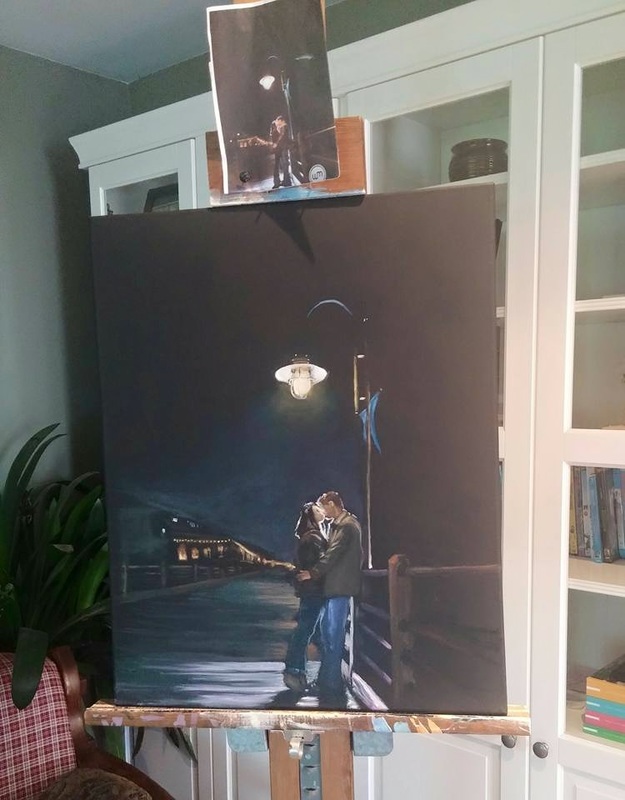
SO Here is where my inexperience kicked in... as I thought this was finished-seen by the signature... I sat there, looking, thinking, researching, asking on art forums etc... I realized I shouldn't have left the black areas as just plain black canvas... I mean.... you wouldn't leave a white canvas white... So After much hesitation, I went back in and got after the canvas with a coat of lamp black. You can see in the photo above the difference between the black canvas and the lamp black. It made the difference I was looking for, but sadly I lost the purple haze I loved so much . I did go back in and add some later, but I was limited on how much I could do because of drying times & a time crunch.
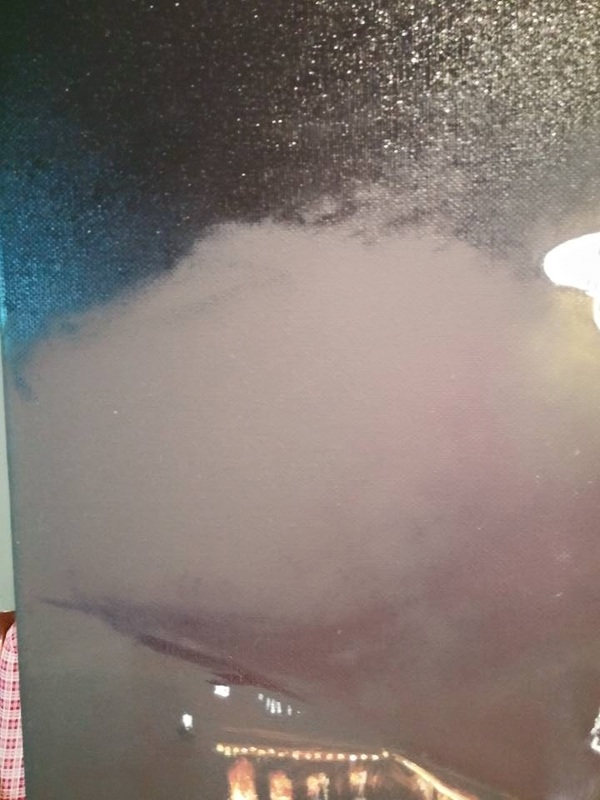
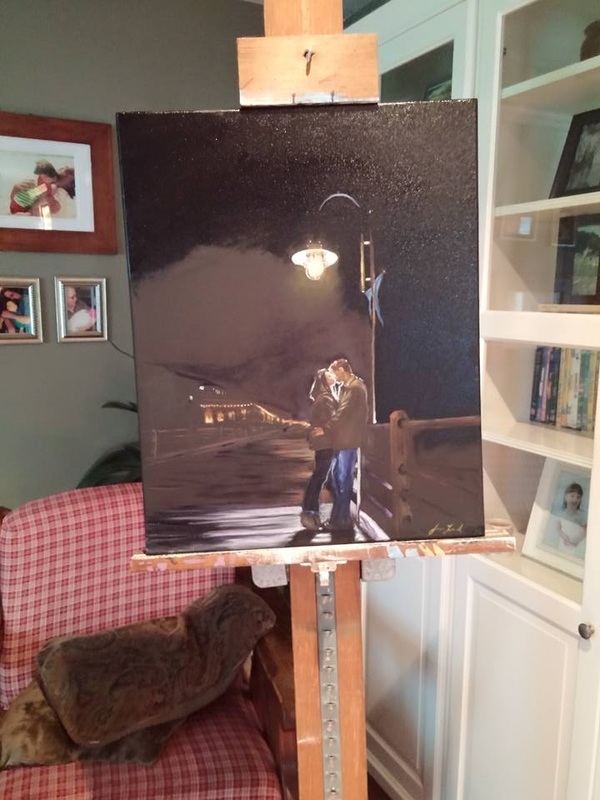
Here is a close up of the lamp black meets black canvas. Here is where I could Totally tell I made the right choice. So now the painting was finished.. I don't have a picture because it was SO hard to photograph next I was about to try something I had never done... Varnish a painting!! In the pic below, if you look at the edges of the canvas you can see just how much deeper the colors get after varnishing. It was nerve wracking, but the outcome was worth it. You are supposed to wait a substantial amount of time for drying before varnishing an oil painting, but I thought I would be okay because i painted in SUCH thin glazes, and I used water soluble oils which dry considerabbly faster.
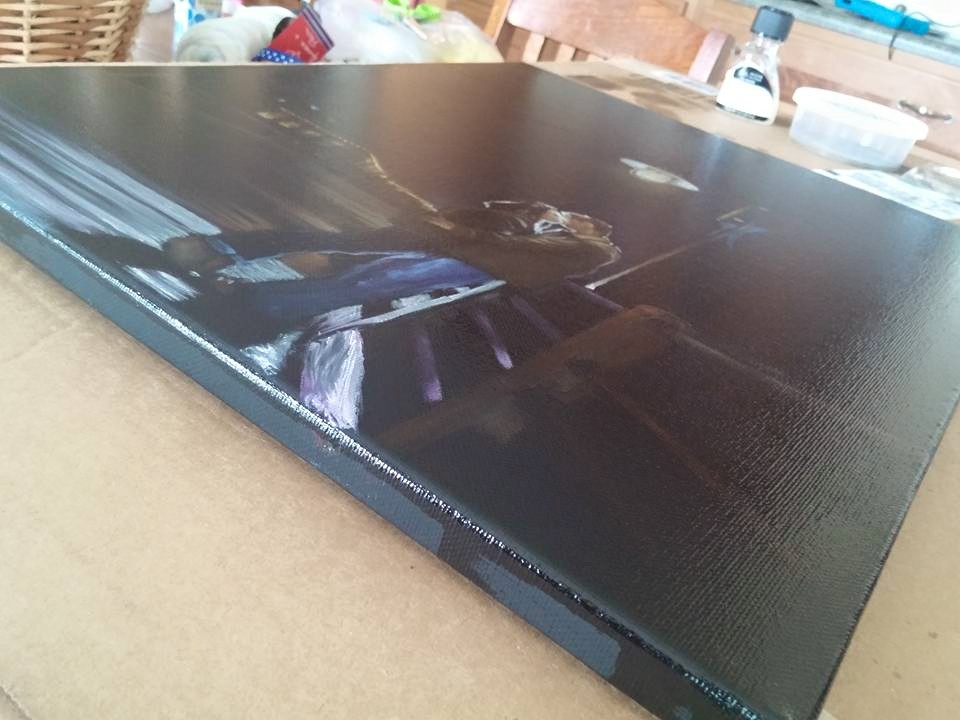
I love how the varnish brought the vividness back to the dried oils and left this beautiful gloss over the whole thing. It really gave it a professional look.
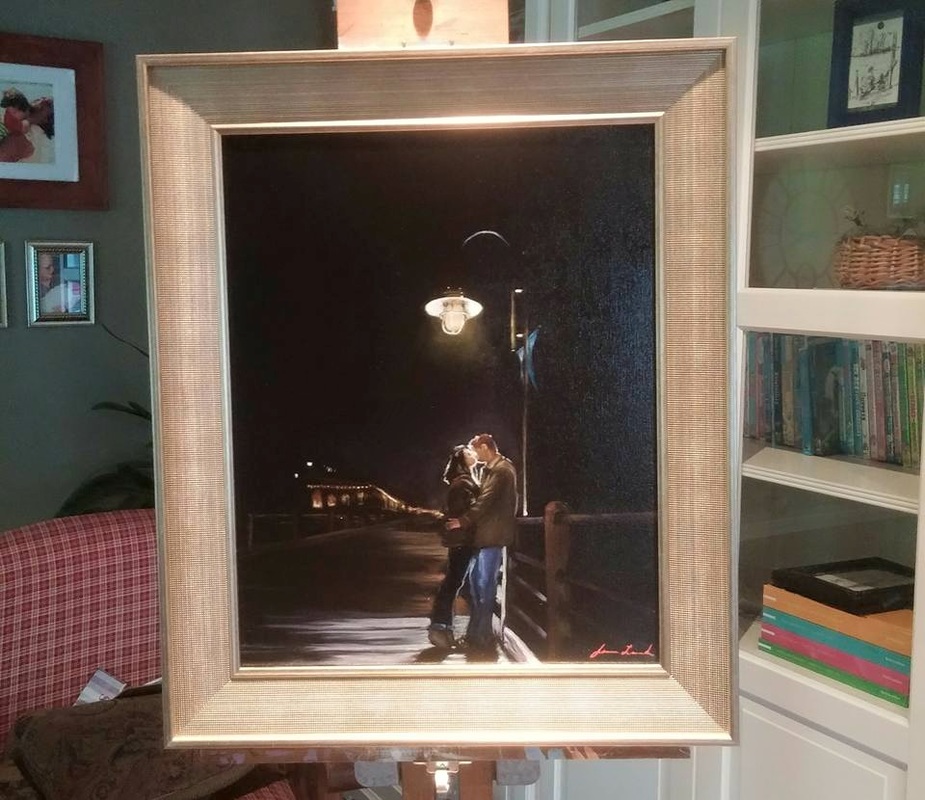
And the frame... I LOVE the frame & I really thought it fit my Friend Dre's style to a "T". This painting is just so romantic... I really love how it came out. It never would have been if it hadn't been for the photographer Warren McCormack who captured the beautiful image to begin with. Thankfully he was nice enough to give me the permission to paint his image. Dre really seemed to love it & I hope it will remind her and her future husband of their young love for years to come!
 RSS Feed
